AFONSOGONÇALVES
ARCHITECTURE | DESIGN | VISUALIZATION

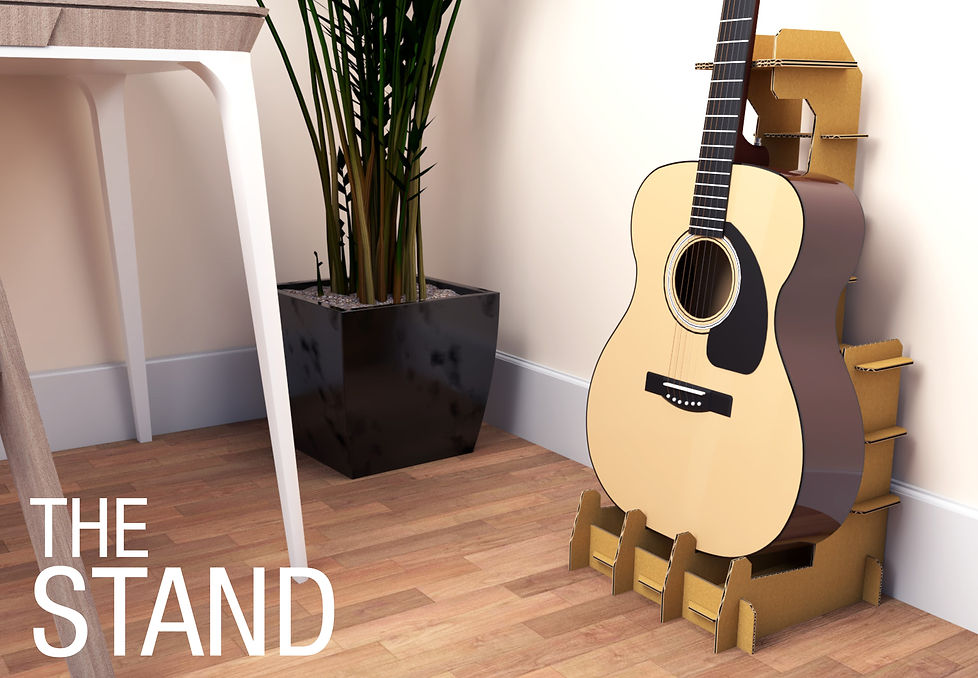
The Stand is a free-standing waffle-structure guitar stand
made of recycled cardboard. Here you will find
all the information you need to design and build your own
Stand.
Given the malleable nature of the cardboard you are free
to follow these instructions or to modify the design in order
to meet your specific needs. Nonetheless, a design will be
suggested here which has been tested and proven to work
for standard sized acoustic or semi-acoustic guitars.
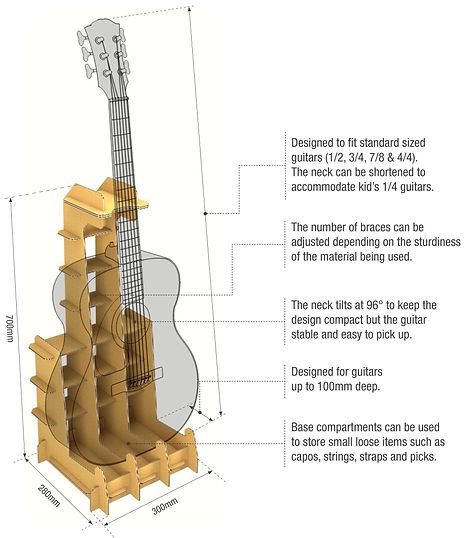
This design, when assembled, is 300 x 280 x 700 mm
(Width x Depth x Height) and composed of 6no. different
components (15no. components in total). All components
fit comfortably in 2no. 800 x 600 mm sheets of recycled
cardboard, allowing for a 20mm margin around the edges
to account for any preexisting damage.
Here is what you will need:
• Recycled cardboard (min. 4mm thick recommended)
• A pencil or a pen
• An X-Acto knife or similar cutting tool
• Ruler and square (recommended)
The components should fit comfortably in two 800 x 600 mm sheets of recycled cardboard but you can use any leftover cardboard you have, provided it’s big enough for the components.
Download CAD drawings (.dwg):
Download SketchUp 3D model (.zip):
Other file extensions are available upon request.
Download product brochure:
 |  |  |
|---|---|---|
 |  |  |
 |  |
Because the thickness of the cardboard will have an effect on some of the dimensions, please note the following:
All dimensions in BLACK are fixed dimensions. These will not change no matter the thickness of the material you are using;
All dimensions in RED are variable dimensions, meaning they will change with the thickness of the material. You will also find red arrows indicating the direction an edge will move as the material thickness changes. Variable dimensions are also complemented with red lines indicating the edges that will change.
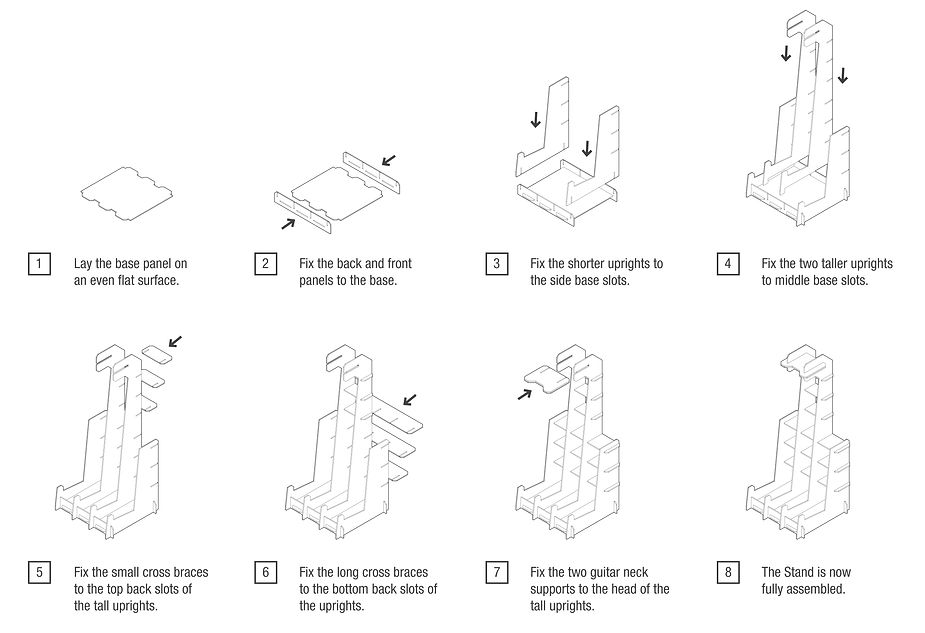
INSTRUCTIONS:
-
Start by measuring the thickness of the cardboard you have. This will be the thickness dimension T.
-
Consult the table at the bottom of each drawing to determine the value of the variable dimensions.
-
Using a ruler and a square, start drawing each component on the cardboard sheets. The Stand has been designed in increments of 10mm so drawing a 10x10mm grid first will facilitate this step.
-
Once all the components are drawn, use a knife to cut them out from the cardboard.
If you wish to use the drawings as cutting templates please print them out on a A1 size paper so that they are at full 1:1 scale.
All dimensions are expressed in millimetres (mm).
ASSEMBLY:
There are no copyrights associated with The Stand. The design is free for you to build from and improve as you see fit.
If you’re posting your build on instagram, much appreciated if you tag me @afogoncalves .